


Hi everyone! WoodUbend here! What is the latest fashion craze that everyone’s talking about? Shabby chic is a style that combines vintage pieces with a modern flair. The result? A look inspired by the past, yet reflecting current tastes and trends–a perfect balance!

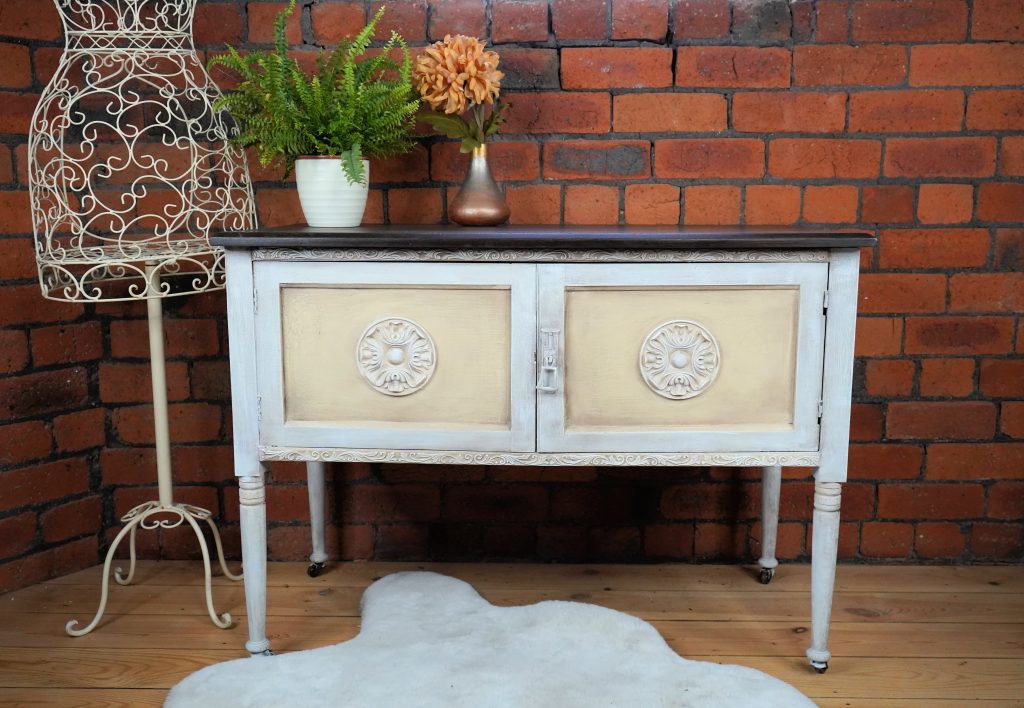
Final Picture of Shabby Chic Blanket Box
The shabby chic style is an accessible and budget-friendly way to update your home. It’s also the perfect aesthetic for those who are looking to make their space appear more genuine with its authentic, handmade feel.
Why did we choose the shabby chic style?
The answer is simple, it’s because of its old-fashioned appeal. The look can be considered vintage or antique but not too out there so you can attract a wider audience when selling your finished projects.
Preparing Our Project
We bought our new piece of furniture from the charity shop so it needed a good scrub. First, we gave it a thorough cleaning.
The next step of this process is sanding off any old paint and wax that may still be on the piece, which will allow for optimum adhesion between coats. As we were preparing our project we noticed that it had a few visible cracks at the front of the piece. We sealed the cracks using Dixie Belle Mud in the colour ‘white’.
After the mud had air-dried we brought a R.A.D pad to the surface and sanded it until the surface displayed a smooth finish.
Our blanket box with legs was finally ready for a furniture flip!

How to Place a WoodUBend Molding on the Blanket Box
Adding Character
There is no question about it – Adding WoodUbend Mouldings and trim adds an abundance of character to your upcycling projects!
Our bendable appliques are now in their 3rd generation which means they have better packaging, sharper details, stronger adherence, greater strength and a multitude of new designs.
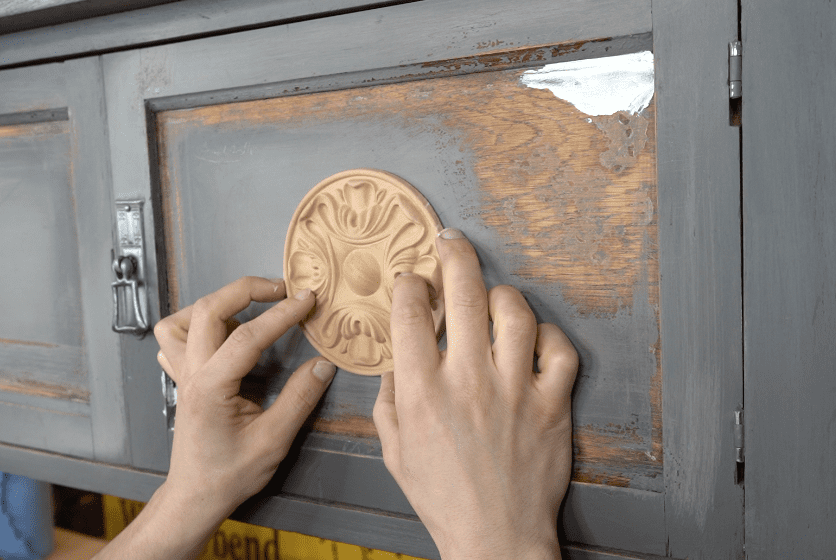
We decided to use our pack of two, circular centrepiece mouldings (6013) for the front of the blanket box.
To add some extra detail to the front we adhered the heat bendable trim TR124 to the border.
When applying 3rd generation WoodUbend mouldings to any surface we recommend you use the 5 simple steps for success.
- Heat your WoodUbend moulding/trim until it becomes flexible. You can do this with a hairdryer, sausage griddle or heat gun if you are feeling proficient. It is important that you keep your heat gun moving in circular motions to avoid scorching the WoodUbend applique.
- Cover the entire back of the surface with good-quality wood glue. We like to use Titebond quick and thick. If you are applying a trim, you can alternatively cover the designated area in wood glue.
- Place your WoodUbend Moulding/trim onto the designated substrate. WoodUbend mouldings will adhere to almost any surface.
- If needs be, wipe away any excess glue that seeps out from underneath the moulding. Don’t worry if this happens, it simply means the heat-bendable mouldings are adhering well to the surface and don’t need any more glue.
- THE MOST IMPORTANT STEP – Reheat your WoodUbend Moulding/trim and give it an extra push. This allows any air bubbles to escape and makes sure the entire surface has adhered to your project.

Steps to Learn How to Paint Shabby Chic
Neutral Tones
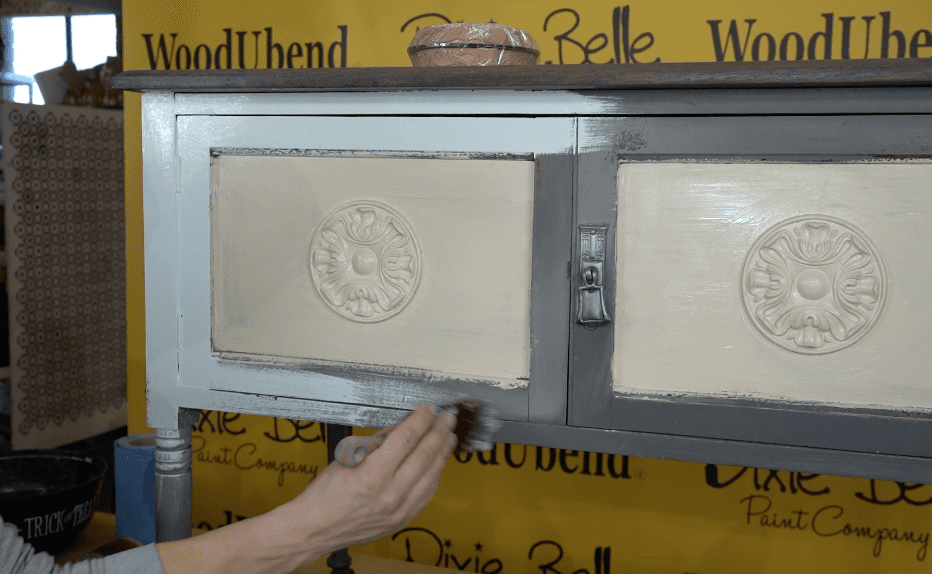
With all the WoodUbend mouldings and trim applied to the project, it is time to bring out the paint! We choose Dixie Belle’s Silk all-in-one mineral paint for this project as it has a smooth look and great coverage.
We wanted to keep the project in keeping with the shabby chic style so we chose colours that would complement each other. The light, warm tone ‘Sand Castle’ was applied to the WoodUbend Mouldings and the centre of the project. A very light grey ‘Oyster’ was applied to the legs, sides and as a border for the front.
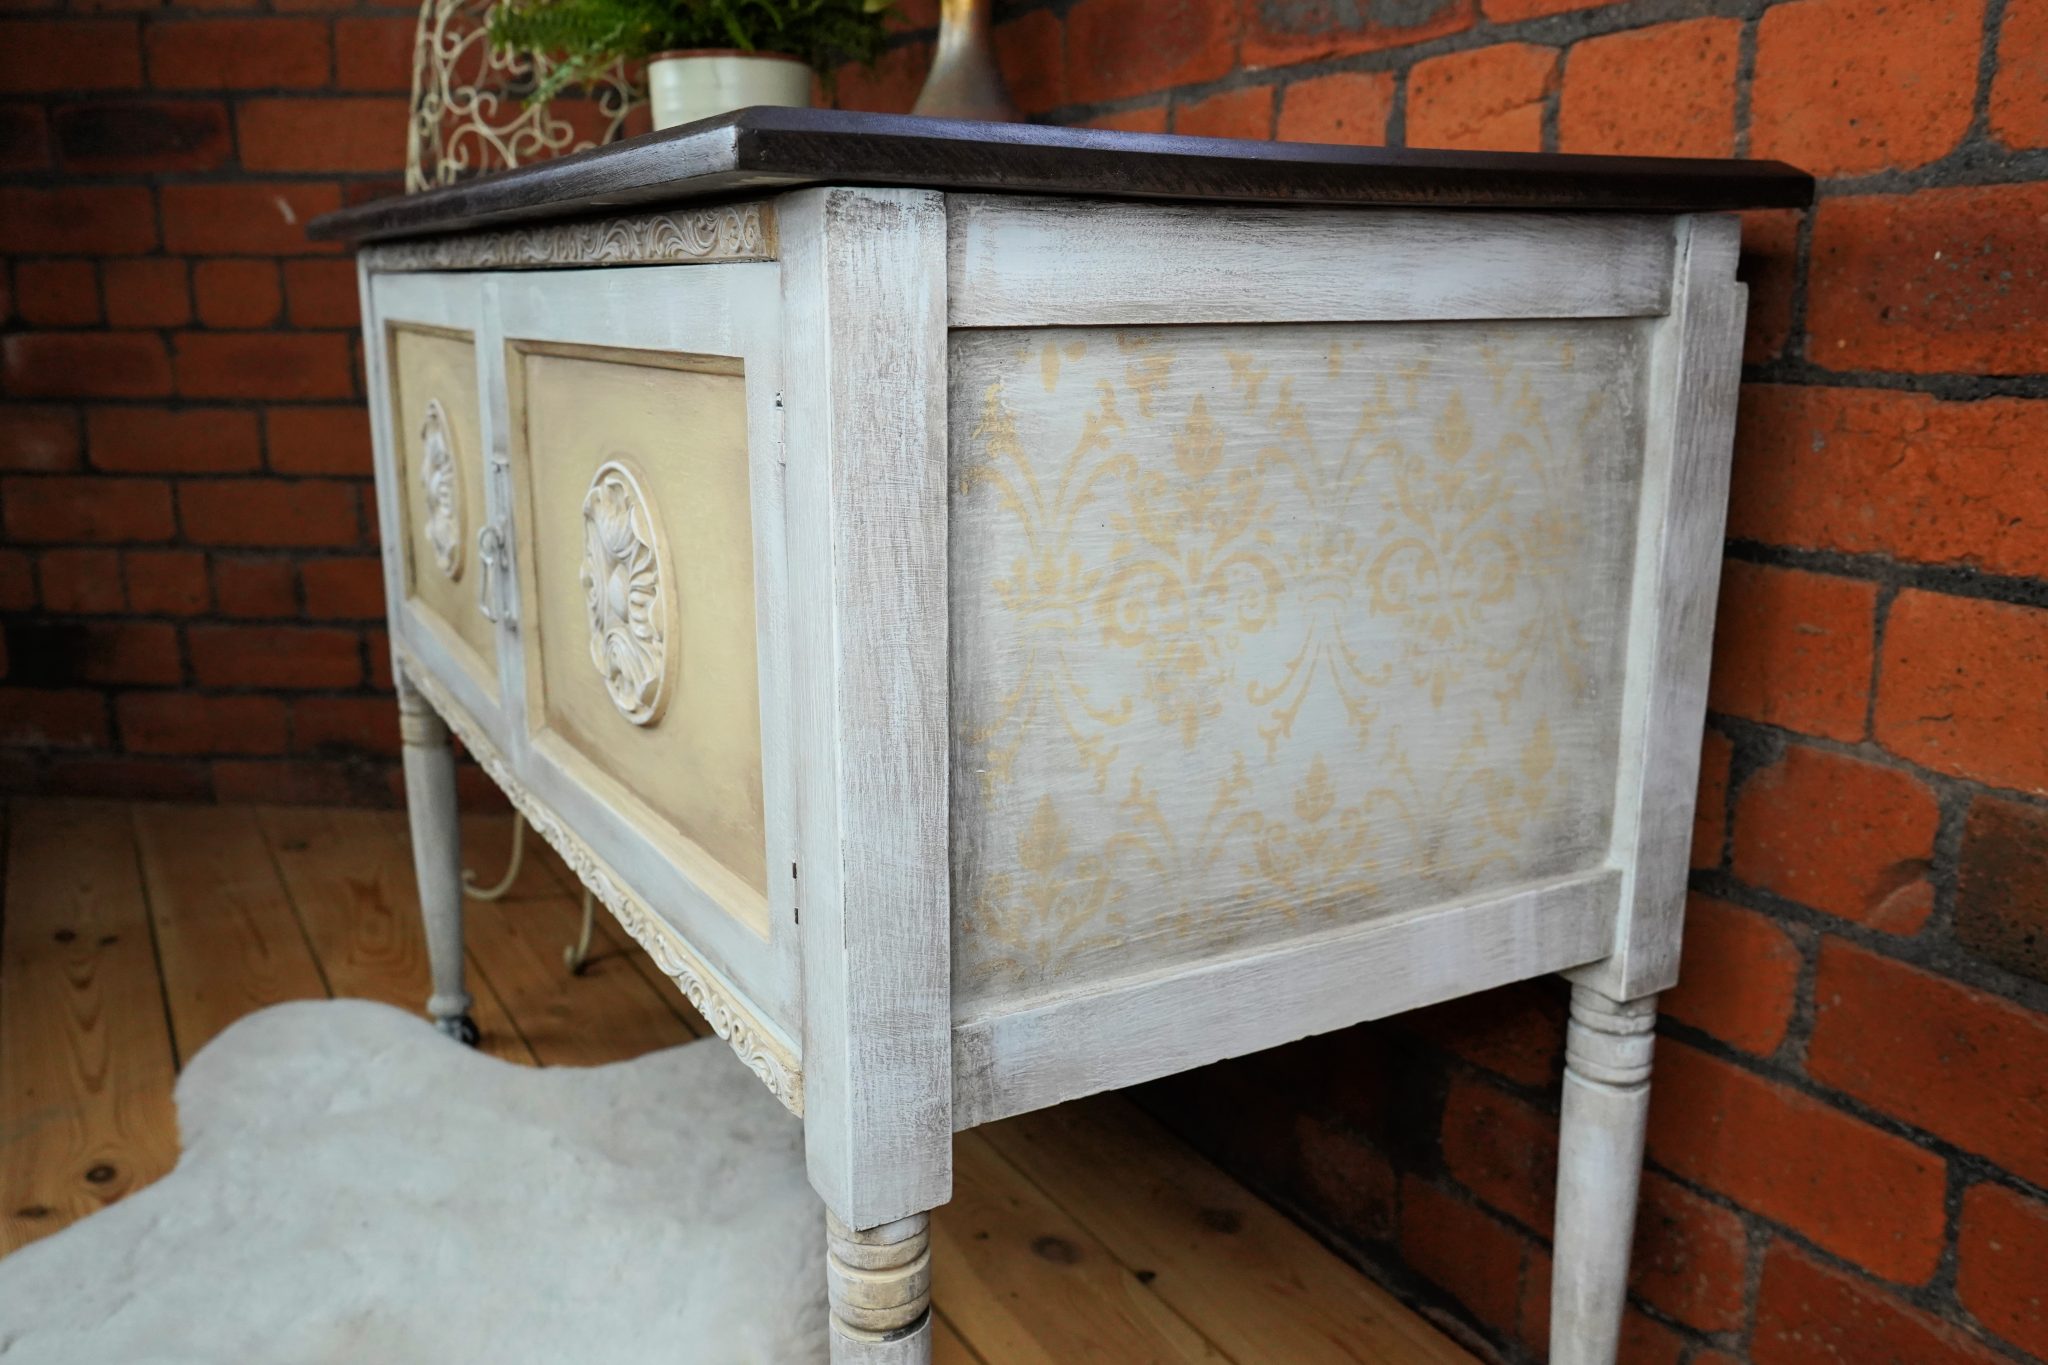
Continuing on with our neutral tones we stippled ‘Sandcastle’ over the Dixie Belle Stencil, ‘Royal Damask’ on both sides of the project. This displayed a subtle continuous pattern along each side of the shabby chic blanket box.
Finishing Touches
Once our two layers of paint were dry we can now apply a new protective layer to the newly-painted furniture. Best Dang Wax in shade ‘Brown’ was added to the entire project and then wiped back, leaving faded shadows behind. By coating the piece of furniture in brown wax and wiping it back we created an old-aged look.
The antique style often includes light shading with patinas and waxes. The weathered look is further enhanced by sanding over the painted surface with a R.A.D pad. The rad pad creates a scratched and weathered look which is exactly what we were going for. Our shabby chic look was definitely achieved after using all of these techniques.
Why not try a Shabby Chic styled project for yourself with all of our useful tips?
If you would like to watch the video of our shabby chic blanket box creation, click here!

Learn How to Paint Shabby Chic
We hope you enjoyed reading about this week’s furniture flip. Want to learn more about WoodUbend? Head on over to the Chalk Mineral Paint Enthusiasts Facebook Group!


