Hi friends! It’s Cindy from Reinvented Delaware! Today, I am sharing with you an easy tutorial for an adorable thrift store home décor piece! Let’s dive in!
Do you love to thrift? I do! It’s always such a surprise at what I come across. Sometimes, I find things I wasn’t even looking for.
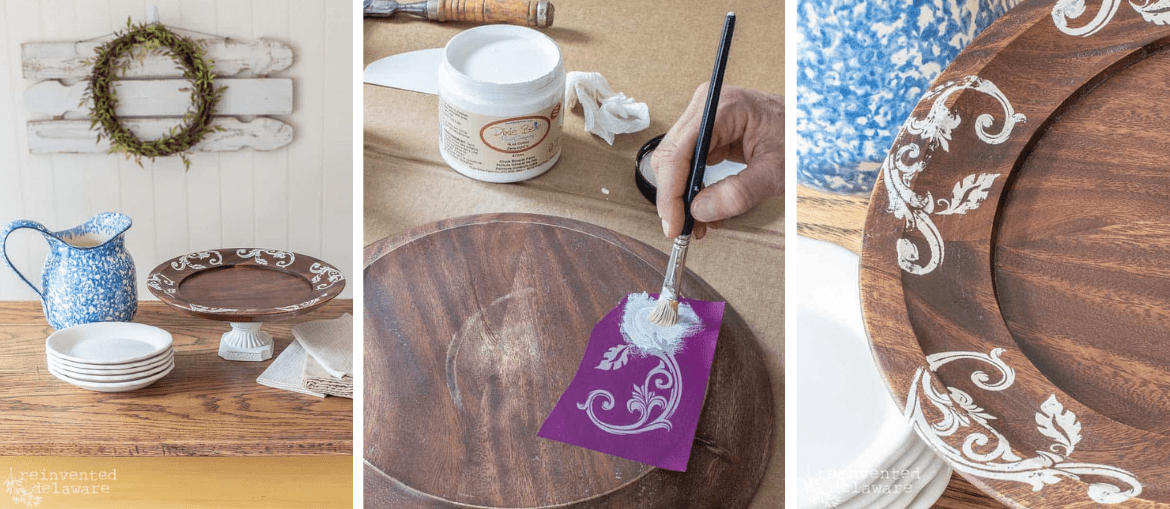
Like this wooden cake plate. I was actually looking for a tray of some sort. I’ve been on a kick lately making risers using thrifted wooden trays. Anyway, I didn’t find a tray but I did see a solid wood plate. I knew I could do the same type of upcycled project with the plate as I did with the trays!
Materials List:
- thrifted wood plate
- pillar candle stand (approx 3″-5″ tall)
- flexibe sanding pad in fine
- metal scaper (I used a chisel)
- Cleaner
- super glue
- scrap of thick fabric for padding
- tack cloth
- Dixie Belle Silkscreen Stencil (I used Floral)
- Dixie Belle Chalk Mineral Paint (I used Cotton)
- Dixie Belle Big Mama’s Butta
- small artists paint brush
- chip brush
- blue shop towel
How To:
Step 1:
To start the project, I scraped off the price sticker with my chisel and then I cleaned the cake plate to remove the sticky residue. Next, I used the flexible sanding pad and went over the top and bottom of the wooden plate.
Step 2:
Choosing which Silkscreen Stencil design I wanted to use was the hard part. The design I chose was small enough to move around the circular shape of the plate easily. This is the first time I have used a silkscreen stencil. I knew it would be easier to work with if my design was separate from the whole sheet. So, I separated the stencil from the backing and cut it with plenty of allowance around the design.
Step 3:
The next step is to apply the silkscreen stencil to the surface. There is a good amount of repositionable adhesive on the backside of the stencil. The package says each stencil can be used 10 times.
Step 4:
The stencil comes with a plastic, flat-edged smoothing tool. I used it to make sure the stencil was firmly in place. Then, I dipped my artist’s brush into just a bit of paint and then dab off most of the paint on a shop towel. Next, I painted and dabbed a light coat of paint over the stencil. There is a thin layer of silkscreen in the decorative part of each stencil and it helps the paint not to get too gloppy.
To read the rest of this lovely tutorial, hop on over to Reinvented Delaware here!
