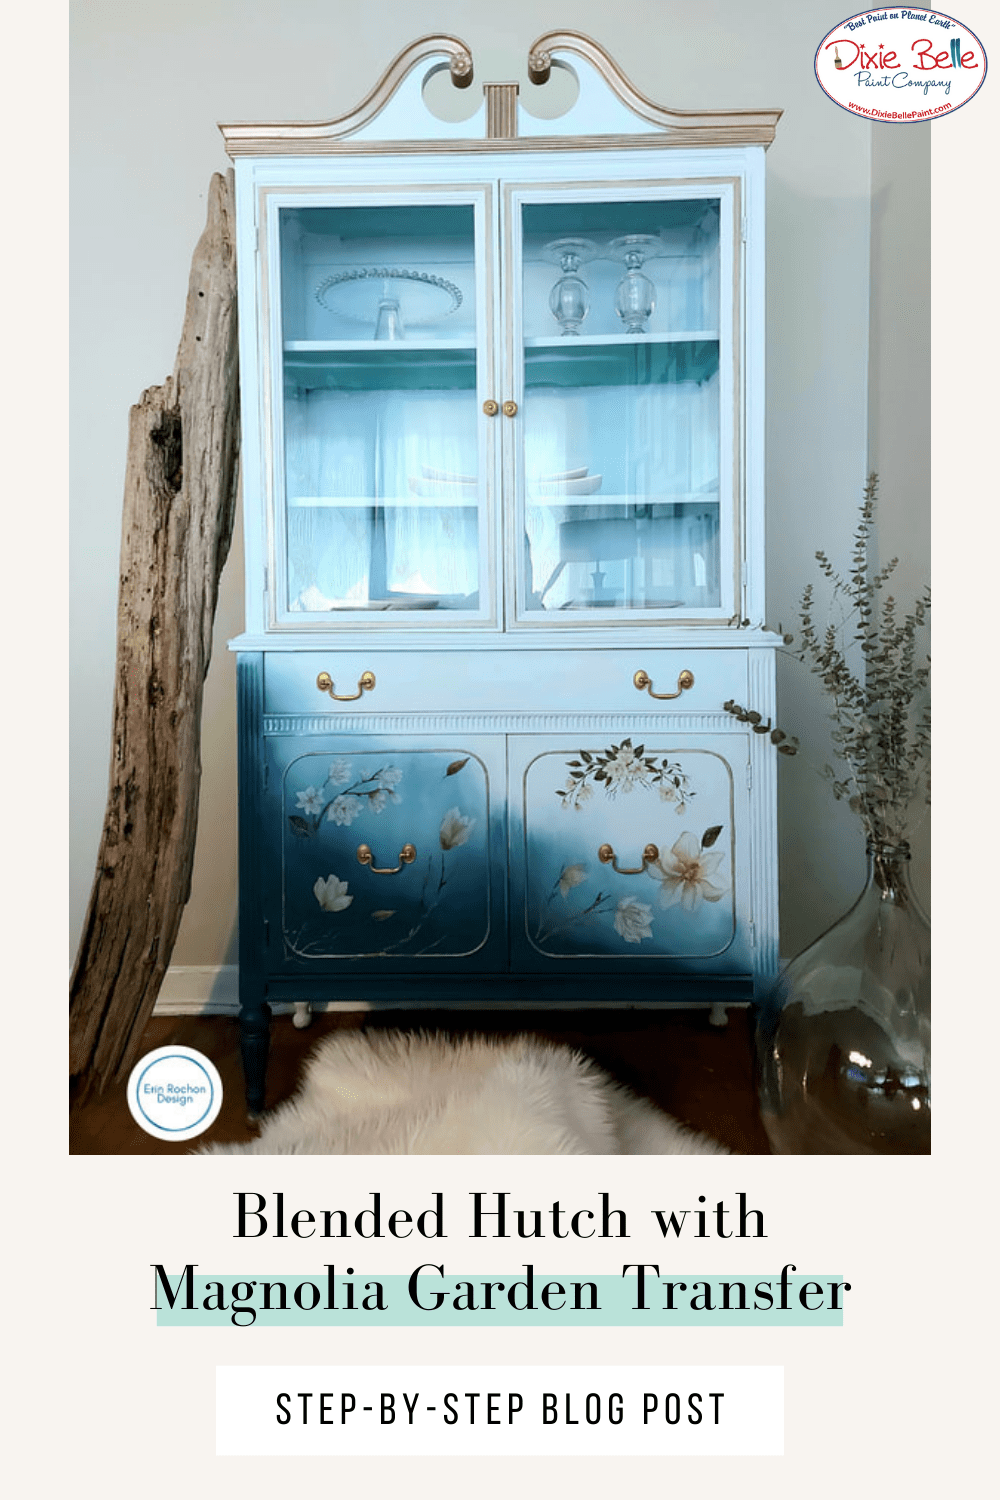
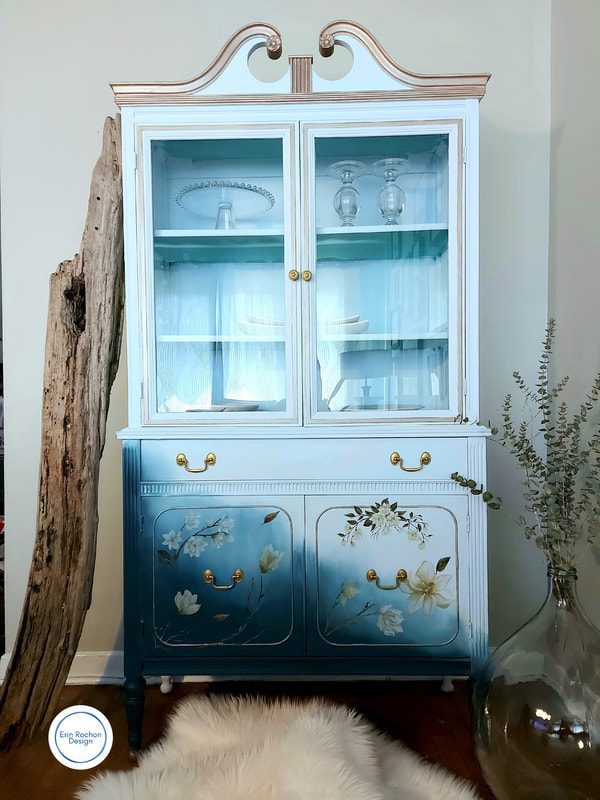
Hi everyone! It’s Erin from Erin Rochon Design! Have you ever lost your creative vision on a project? I have had this tired, half finished hutch filled with my tax receipts sitting in my home for some time now. I lost my creative vision and I stopped working on it.
When Dixie Belle recently introduced their new line of transfers from the Belles and Whistles line, I was so inspired! The Magnolia Garden Transfer was the perfect addition to this hutch, I was so excited to try it out. Here is how you can create this look using this gorgeous transfer on your next project.

Materials List:
- Magnolia Garden Transfer
- White Lightning
- Dixie Belle Paint in Haint Blue, Antebellum Blue and Moonshine Metallics in Steel Magnolia.
- Continuous Fine Mist Spray Bottle
- Gemstone Mousse in Golden Gem
- Belle Brush, La Petite Brush, Best Dang Brush, Scarlet Brush and a fine artist brush
- Satin Clear Coat
- Scissors
How To:
Step 1:
Even though I had previously painted this hutch, I wanted to start off on the right foot. I gave it a quick prep by cleaning it with White Lightning, scuff sanded with 220 sandpaper and wiped off the residue with a damp rag.
Step 2:
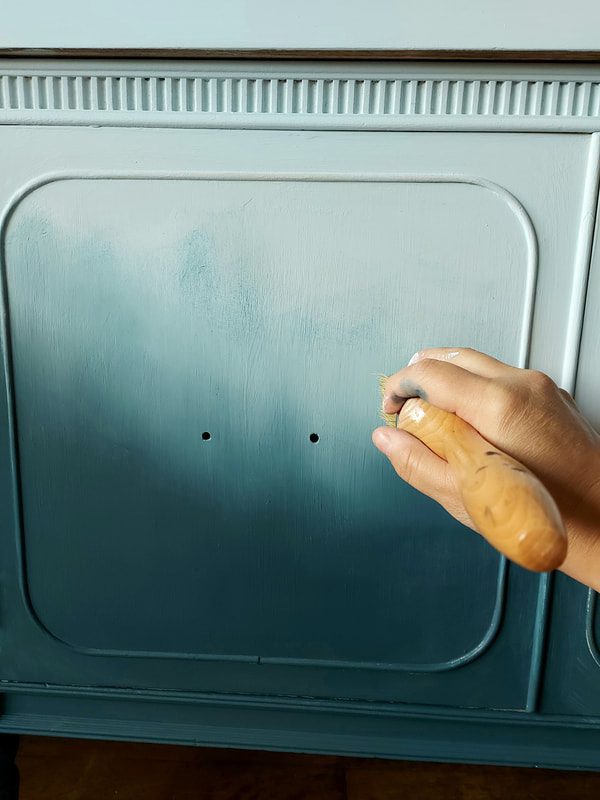
My plan was to create a blended technique, using Antebellum Blue on the bottom and Haint Blue on the rest of the hutch. Using my La Petite Brush, I painted the bottom section in Antebellum Blue to create a base coat before I began blending.
Step 3:
Using my Belle Brush I painted the remainder of the hutch in Haint Blue leaving a slight space between both colours.
Step 4:
Once my paint was dry, I applied my second coat of each colour. Using my Best Dang brush, I began blending each colour slowly and misting with the Continuous Spray bottle. I blended my paint in a circular motion, side to side, up and down to blend out any lines in my finish. Once I was happy with the result I let my paint dry.
Step 5:
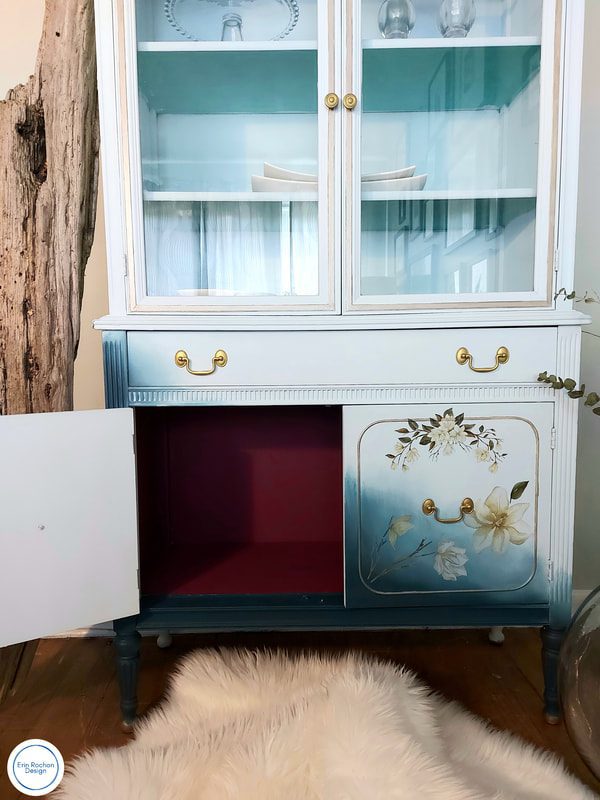
My plan was to use the Magnolia Garden Transfer on the doors of the hutch. I cut out the images and taped them up on the doors to help me decide on placement. It is a great way to try out different transfer placements.
To read the rest of this beautiful tutorial, head on over to Erin Rochon Design here!