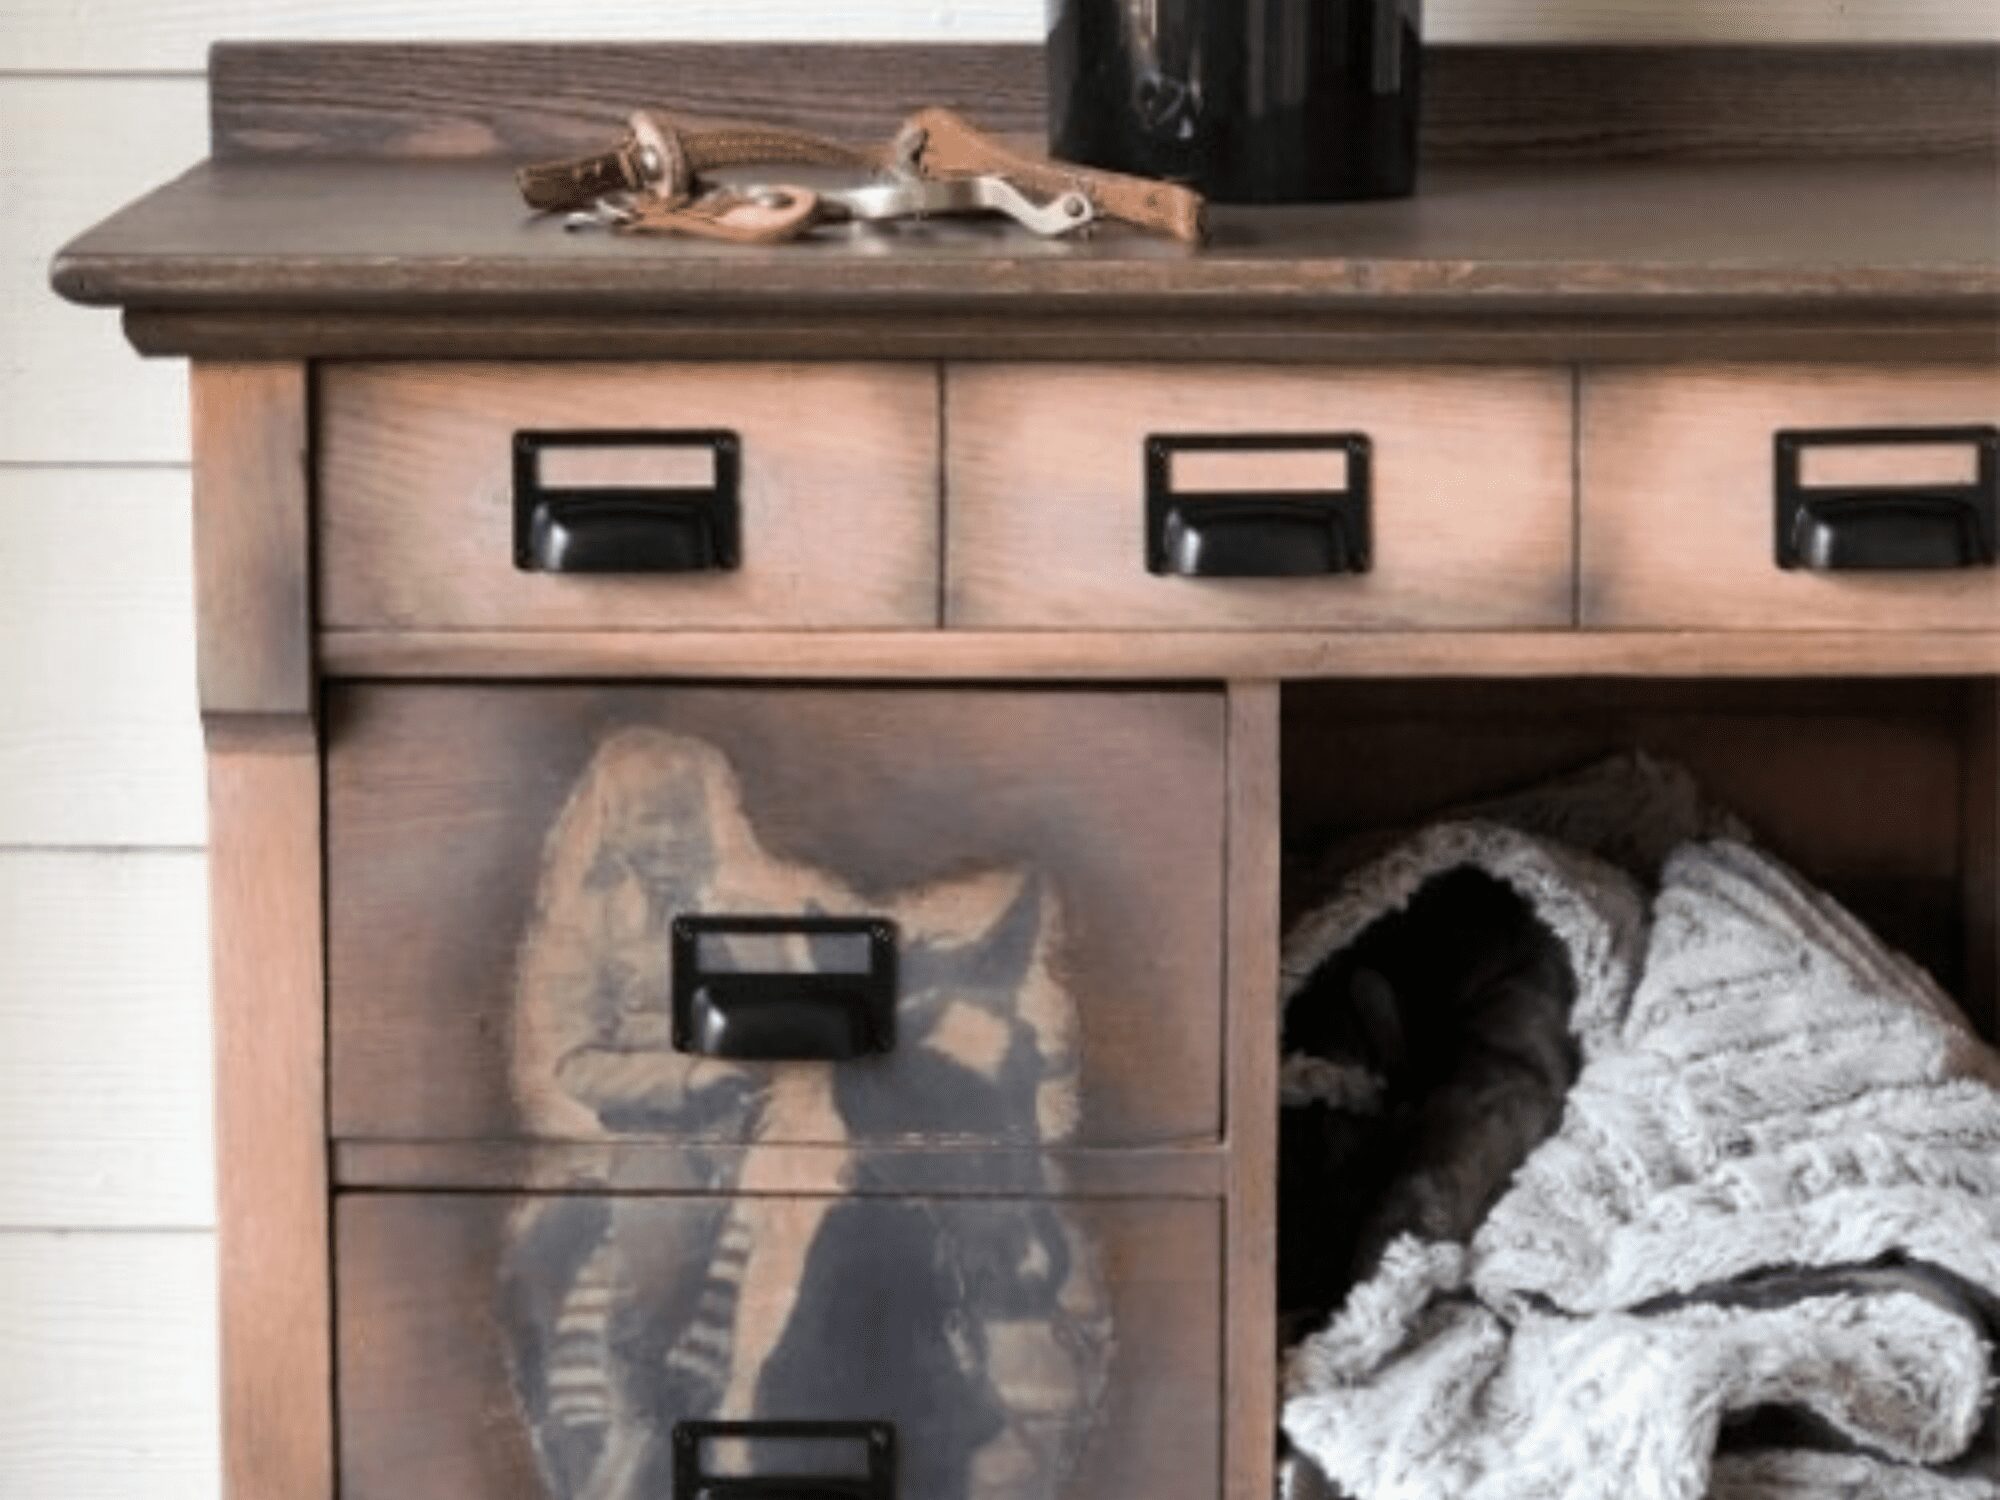
Hey there, my creative friends! It’s Do from Do Dodson Designs! Do I have a surprise for you! Did you know that you can make your own furniture transfers??? I was shocked when I figured out that all I needed to do was to pull out my iPhone and take a pic. Well, there’s a little more to it than that but not much. Today I’ll show you how to create your own photo transfer and how to apply it to wood furniture. The same process can be used on painted furniture as well.

Materials List:
- SurfPrep Sander (for stripping wood furniture)
- Laser printed image of a photo on regular paper (inkjet printer copies will not work)
- Dixie Belle Satin Clear Coat
- Paintbrush
- Fine Mist Sprayer
- French Tip Brush (for wax application in corners)
- Black and White Wax
- Large Wax Brush
- Dixie Dirt (charcoal)
- Hardware Pulls Card Catalog Hardware
- No Pain Gel Stain (Espresso and Pickling White)
- Staining Pad
- Gator Hide
How To:
Step 1:
Firstly, when you have your image printed, 1) make sure it’s laser printed on regular paper. This is super important because the inkjet prints will not do well. 2) If your image has words you will need to flip (reverse) the image. If not, your words will be backward. NO Bueno! 3) Make sure that your image will fit the area you’re applying it to.
Step 2:
For a rustic edge on the photo transfer, try tearing around the image before applying it. Of course, you can transfer the whole image if you want to… just be sure to trim it to fit before applying the transfer (clear coat) medium. For this project, I am using Dixie Belle’s Clear Coat as my transfer medium.

Step 3:
Next, once the image has been applied to your furniture, work from the inside-out of the photo transfer to push bubbles to the outer edges. Remember the transfer medium that was applied also works as a glue. Bubbles left under the transfer will affect the image and adhesion. Work slowly and take your time. Once it’s smooth, allow the image to completely dry. I recommend 24 hours to be safe.
Step 4:
Once the image has dried completely (24 hours), I misted over the image with water and gently rubbed the paper to reveal the image underneath. This is a delicate process and I recommend using your fingertips.
Step 5:
You may need to remove the paper backing in layers. I noticed white paper fuzzies left behind afterward so I went back and misted it again with water and rubbed gently to remove any leftover paper. That did the trick! Be careful not to overuse the water. Too much will damage the paper image and cause tears.
Step 6:
Next, wait for it to dry… AGAIN! Once it’s dried use the Dixie Belle Gator Hide to seal your image. The Gator Hide can also be used over natural wood as a sealer. It’s my fave!
To read more on how to add a photo transfer to wood furniture, head on over to Do Dodson Designs here!


