Hi, I’m Regina and this is Saved From Salvage. I love to share DIYs, Home Decor Projects, Event Inspiration, and Recipes. Do you love to add simple fall decor but don’t want to spend the money? I’m sharing the best ideas for drawing and painting an easy fall pumpkin you can customize to fit your style using Dixie Belle Paint.
I love the fall season and I love to decorate using nontraditional fall colors. Here is a great way to make an easy-peasy pumpkin using Dixie Belle Paint. When it comes to fall decoration, I tend to think less is more. Adding fun ideas like my cinnamon pumpkins that you can see here, or my favorite fabric pumpkins in a previous post here are my ideas for fall decor.
MY FALL DRAWING CHALLENGE
I was thinking about different ways to add some autumn vibes to my house. Kirklands had a cute white pumpkin and the background was the color of pumpkin pie. I thought this would be fun to recreate using a different color. It turns out that it was such an easy fall craft idea that I wanted to do a blog post and share it with you.
EASY STEPS TO CREATE A FALL THEME DECOR
The first step in creating this fall-themed project was to find a pumpkin shape that I liked. It’s that time of year when we are adding fall things to our homes and pumpkins are all around. I am sharing easy pumpkin drawing ideas for you to recreate. I will begin with lots of ideas for any skill level then share how to fill in the pumpkin with Dixie Belle Paint Company’s Mud and use some Silk Mineral paint the background to be finished. You could also think of other fall drawing ideas and add fall leaves, a maple leaf or even think about any other symbol of fall to add.
SUPPLIES
-
BLANK CANVAS
-
DIXIE BELLE PAINT MUD IN WHITE
-
SPACKLE
-
DIXIE BELLE PAINT IN YOUR FAVORITE COLOR
-
DIXIE BELLE’S PAINT BRUSH
-
PENCIL
-
WOOD SCRAPS
STEP ONE – DRAWING
Begin with a piece of paper with a white background and draw your pumpkin shape. You can begin with a circle or an oval, depending on your preference. After you have an oval or circle, you can add a stem. You will want to have the bottom indented, sketch, erase, and draw again until you are happy with your shape. If you are not comfortable doing a free fall drawing, you could also print off a picture of a pumpkin from Canva or the internet. Either way, when you are done and have a shape you like, cut it out and then trace it onto your canvas.
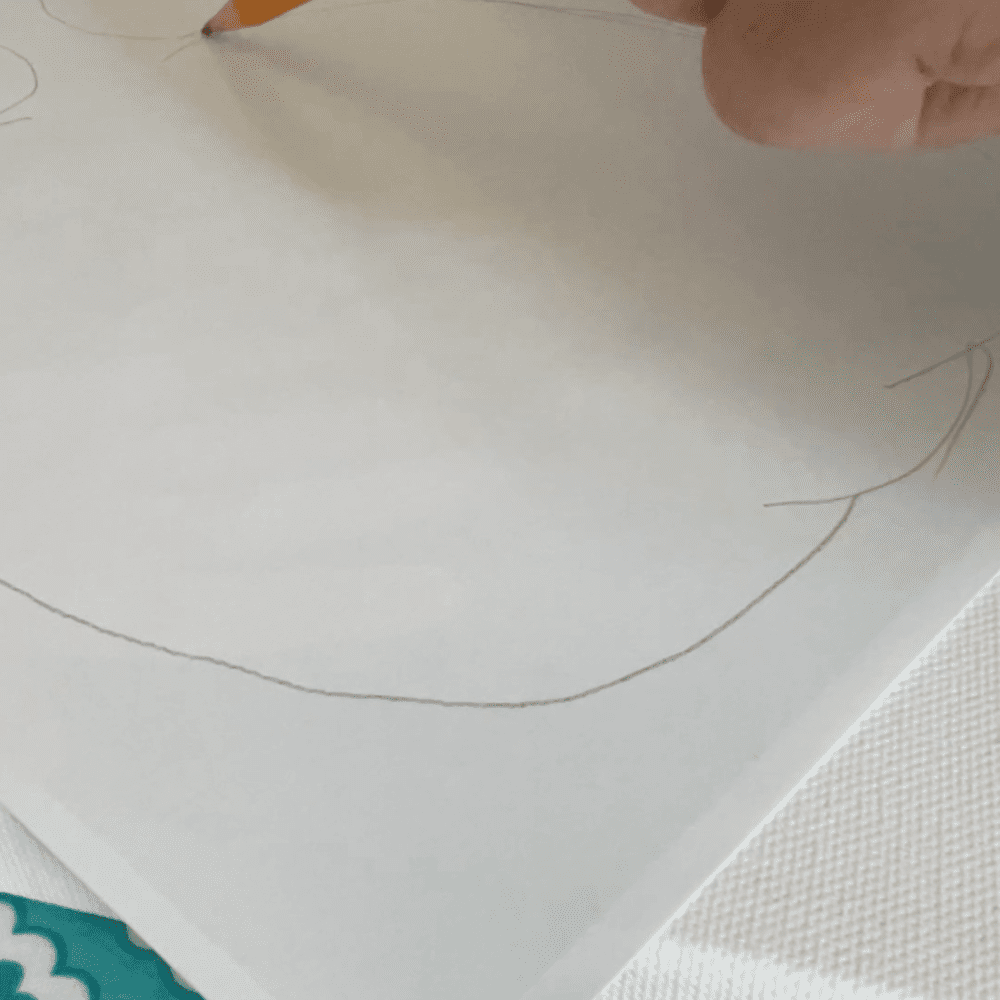
STEP TWO – CUT OUT AND TRACE
Once you are done with your drawing and you cut it out and traced it onto your canvas using your pencil, it’s time to add any other fall items. If you want to add any small details like leaves or vines, you can add them now. Again, they can be printed or sketched by hand. If you don’t love freehanding, you can use Dixie Belle Paint’s Mylar Stencils for mistake-proof designs. You could add fat pumpkins and tall pumpkins together.
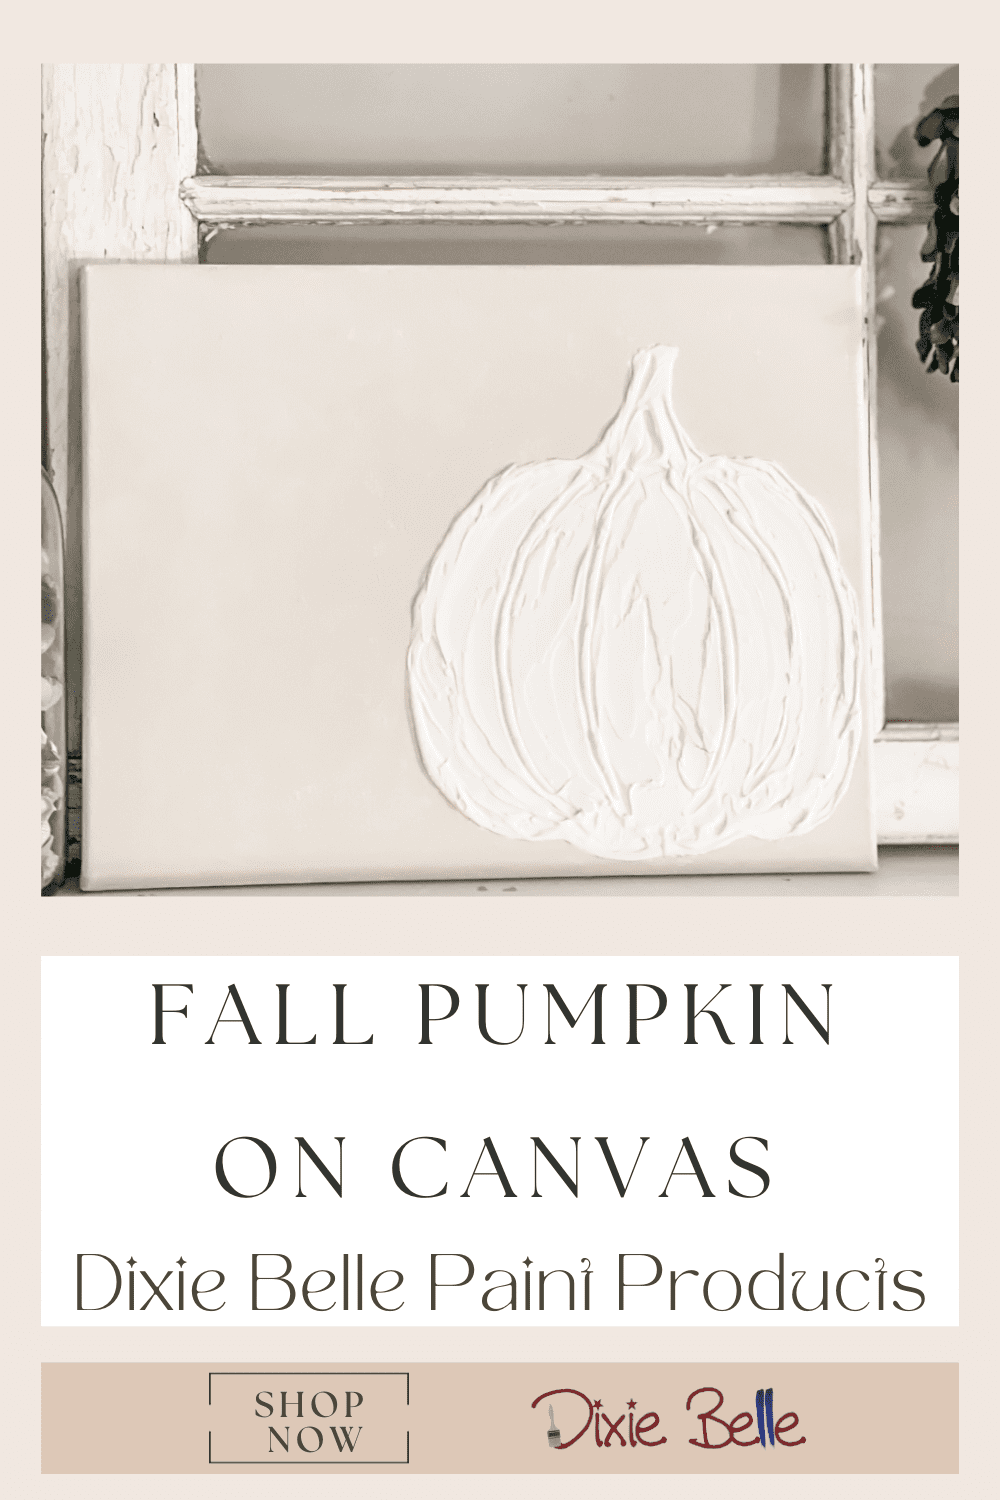
Next, you need to decide where on the canvas to place your pumpkin. I placed my pumpkin to the right on my canvas so I had more empty space on one side. This would allow me room if I wanted to add any type of autumn text to the sign.
STEP THREE – FILL IN THE PUMPKIN
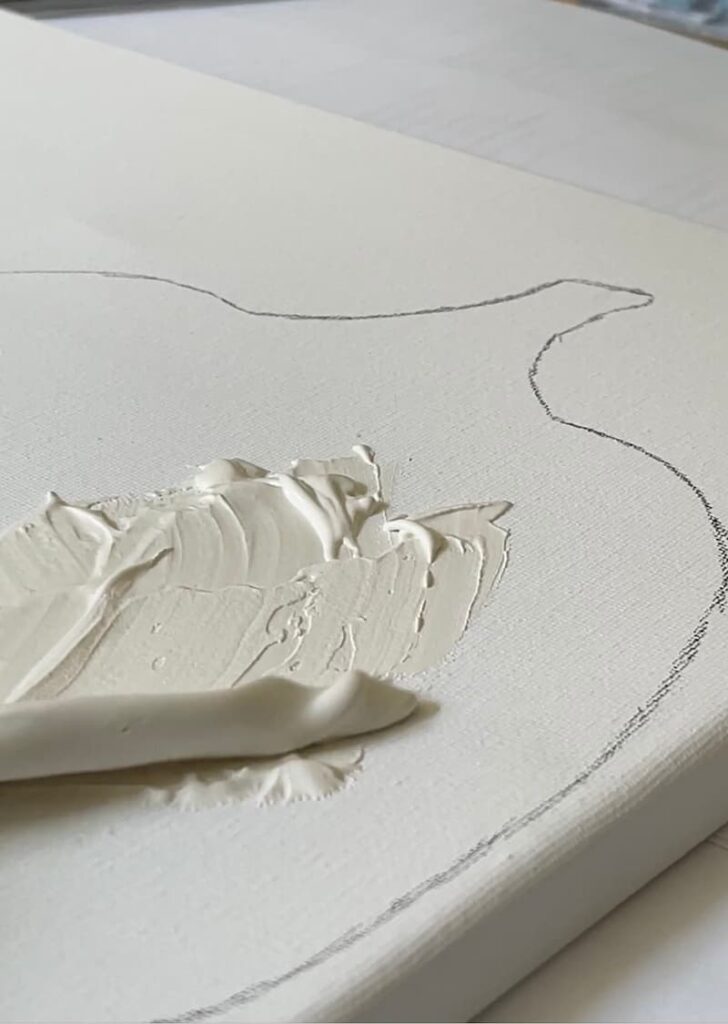
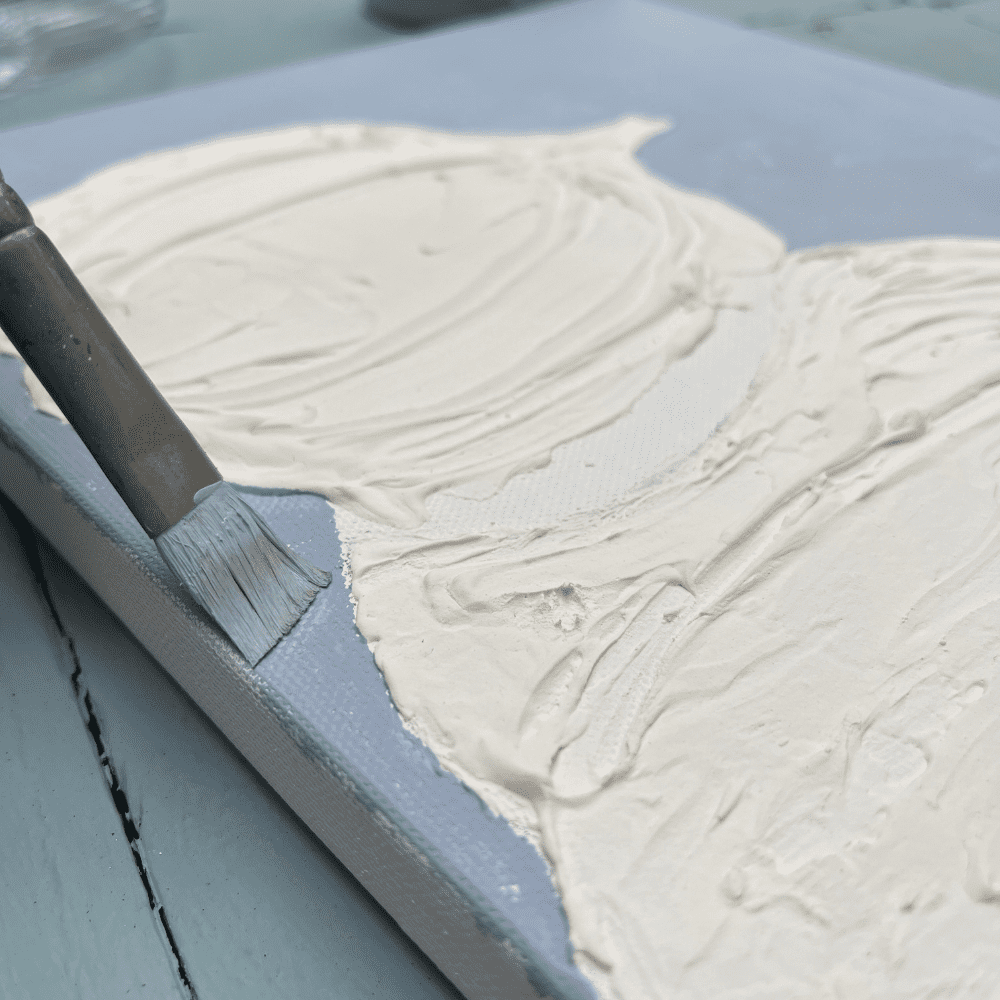
Now comes the fun part. This is the first time I’ve used Dixie Belle Mud in this way and I’m hooked. Using a Dixie Belle Paint’s Artistic Paint Brushes, begin filling in your design with the Dixie Belle Mud. For this portion, you are using fine motor skills to stay within the lines of the pencil-drawn pumpkin.
If you choose to paint the canvas after you make your pumpkin, having a thicker edge makes it easier to paint the background. You have that edge of dried mud to stop you and keep it neat. When you have coated the entire pumpkin, you can take any object and pull it through the Dixie Belle Paint Company’s Mud to create lines and more texture on your piece.
Next, you set this aside to dry. If you choose not to leave it white and to add autumn colors to your pumpkin, you will do that after it dries.
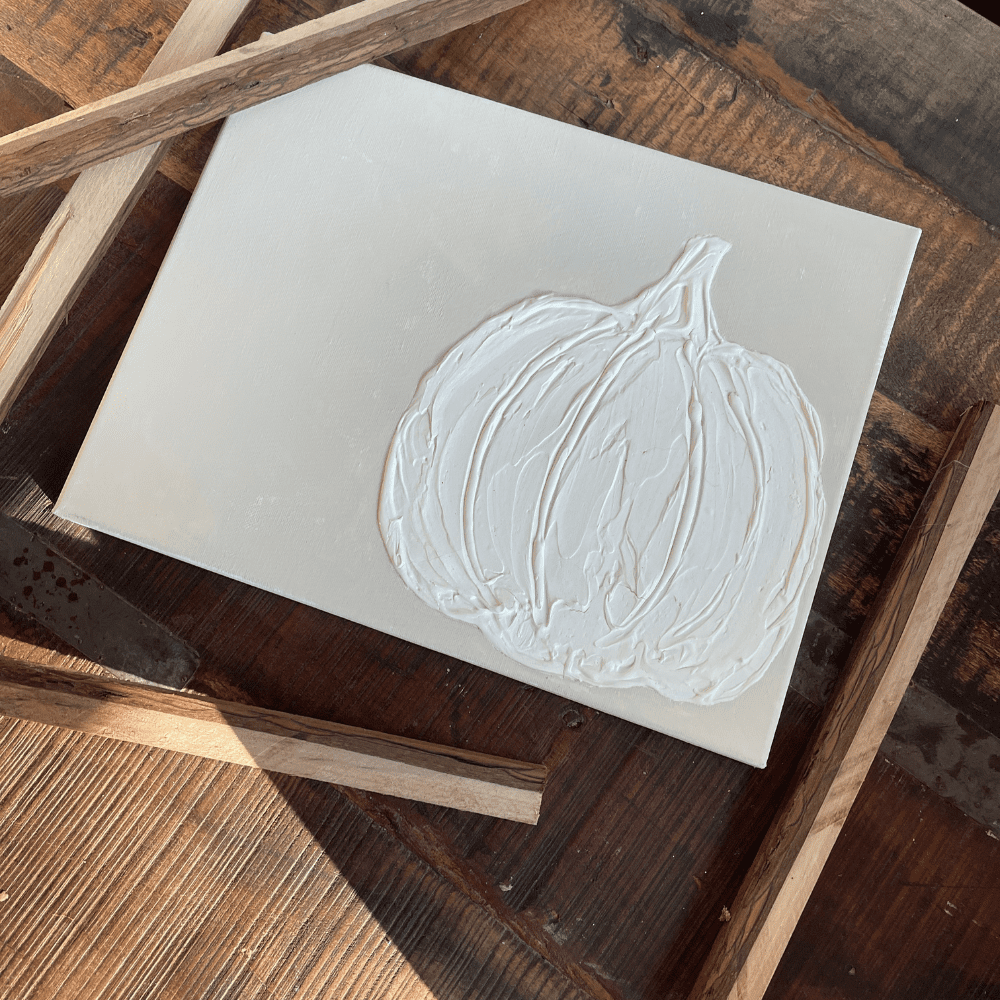
STEP FOUR – PAINT THE BACKGROUND
Now that the pumpkin is dry and you have added any color to the pumpkin it’s time to paint the background. Hopefully, you have made the edges of the pumpkin thick so painting the background is easy. You could also add some colorful leaves to the ground if you wanted to show off your drawing skills.
- For my first pumpkin drawing, I chose to paint the background in Dixie Belle Chalk Mineral Paint Drop Cloth.
- For the single pumpkin, I loved the slight contrast that Drop Cloth added to my picture.
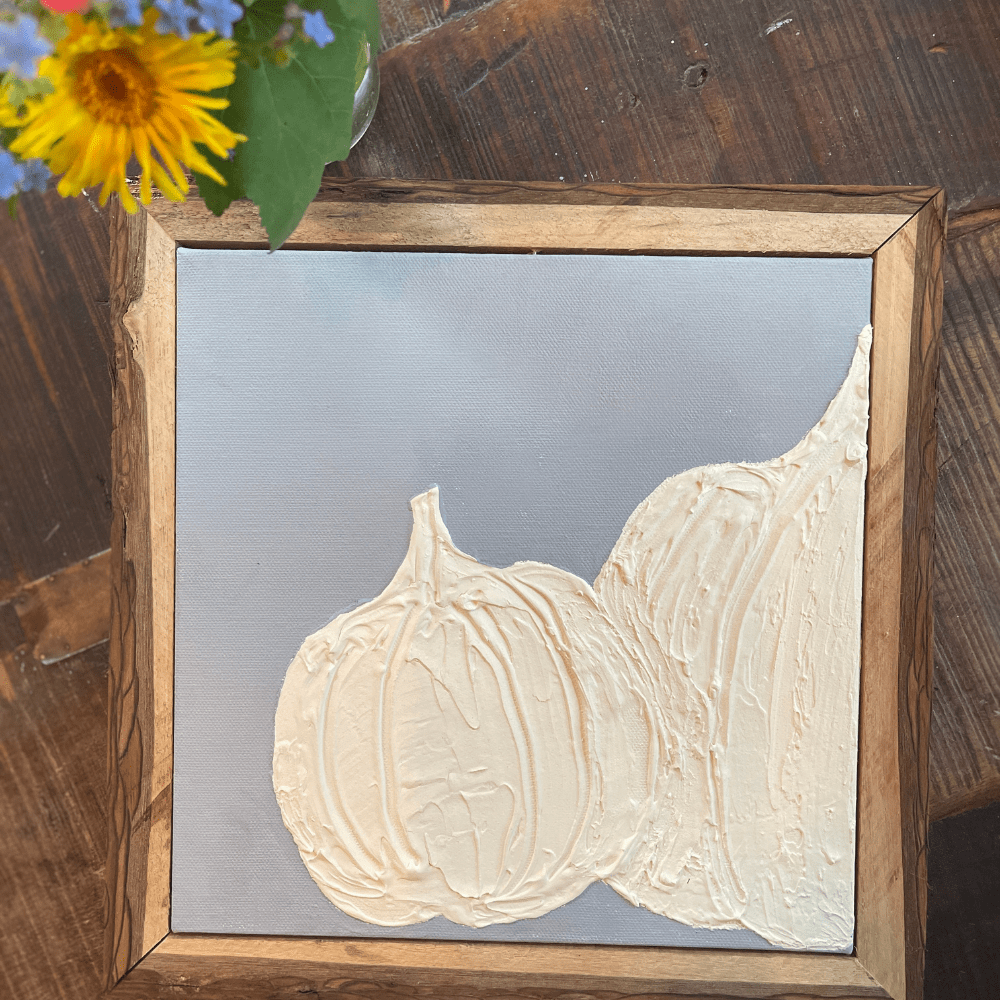
- For my second pumpkin, I used Dixie Belle’s All-in-One Silk Mineral Paint in color Quiet Cove mixed with a little bit of White Cap.
Both were beautiful neutral pictures to hang but my favorite thing was the texture of the pumpkin using the Dixie Belle Mud.
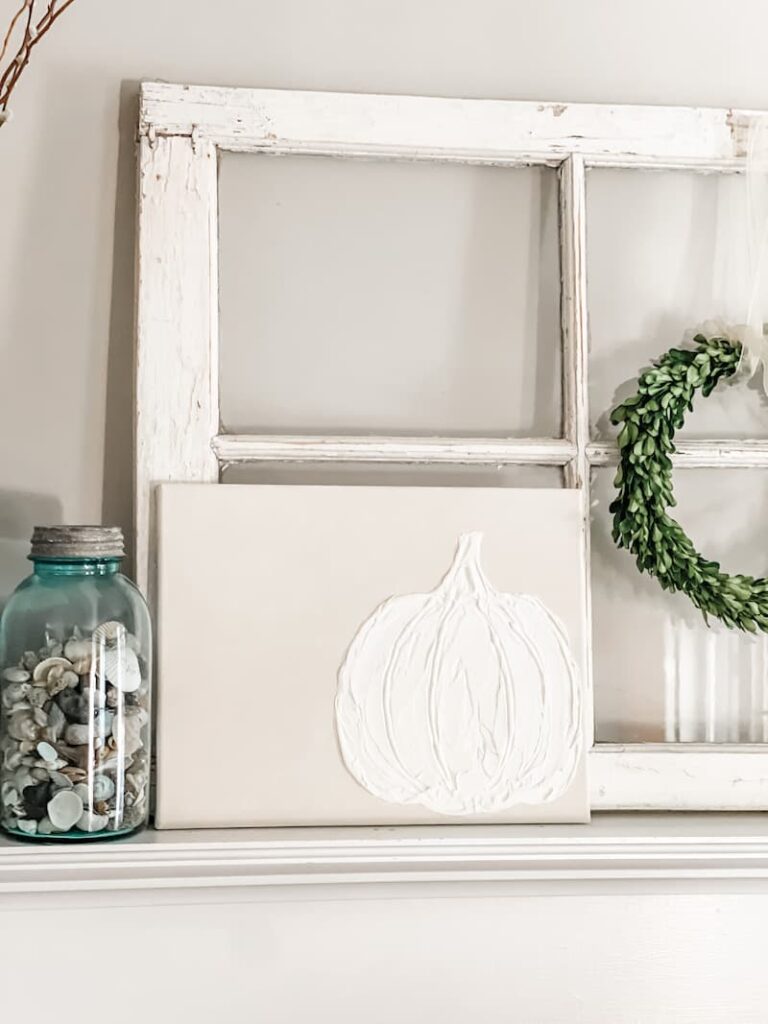
STEP FIVE – ADD A FRAME
I decided to use some leftover black walnut wood from the boxes we made and create a frame for them. In reality, I actually didn’t have enough length to frame the first one, I think that would have looked best but I did for the blue one. So, we took some of these scraps and cut them at a 45-degree angle with the chop saw.
Next, I attached the frame pieces to each other with a nailer.
The last step was to add one nail on each side of the frame to hold it to the canvas. I love how it turned out.
OTHER IDEAS
If you wanted to create a fun art project for a little one, you could let them use the Dixie Belle Mud-like finger paint and try to stay within the lines of your pumpkin.
If you enjoyed creating a pumpkin, you would probably have a great time adding things nature provides like real leaves, acorns, or berries to your picture.
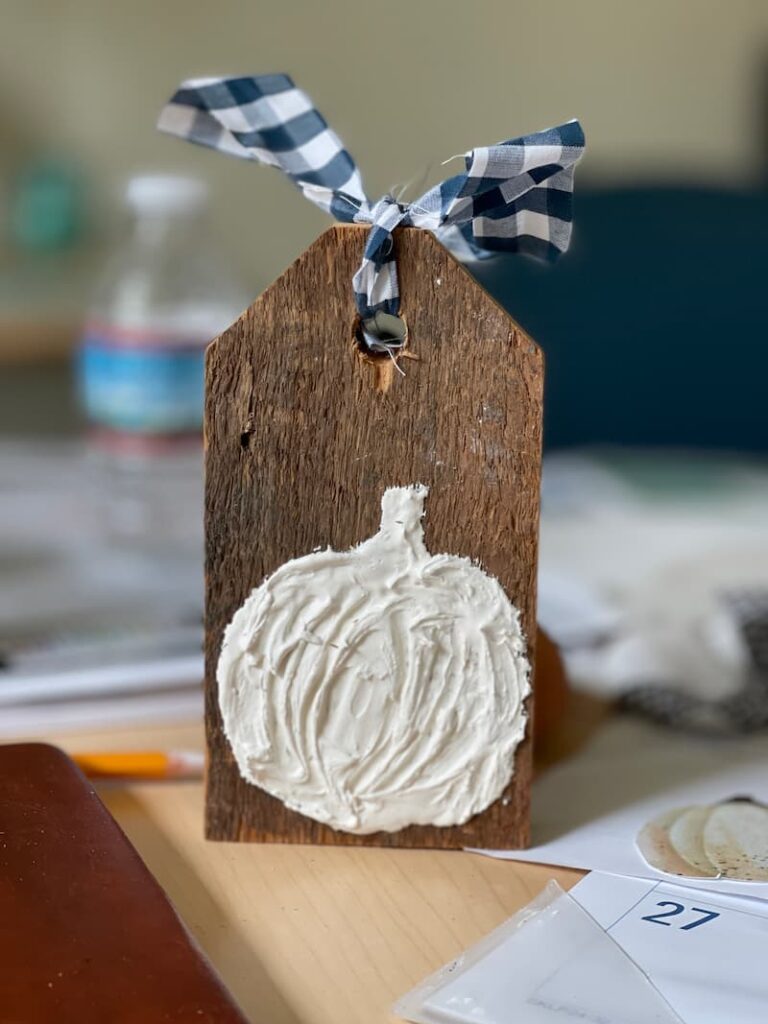
I had some more scrap wood and this would make a cute project too. I used the same drawing method as the canvas, added the mud, and tied it with a ribbon.
This would add even more dimension and it would be fun for little kids to gather the things in nature to add to the picture. I hope you enjoyed my fun fall drawings as much as I enjoyed making them.
Thanks so much for stopping by,
XO, Regina