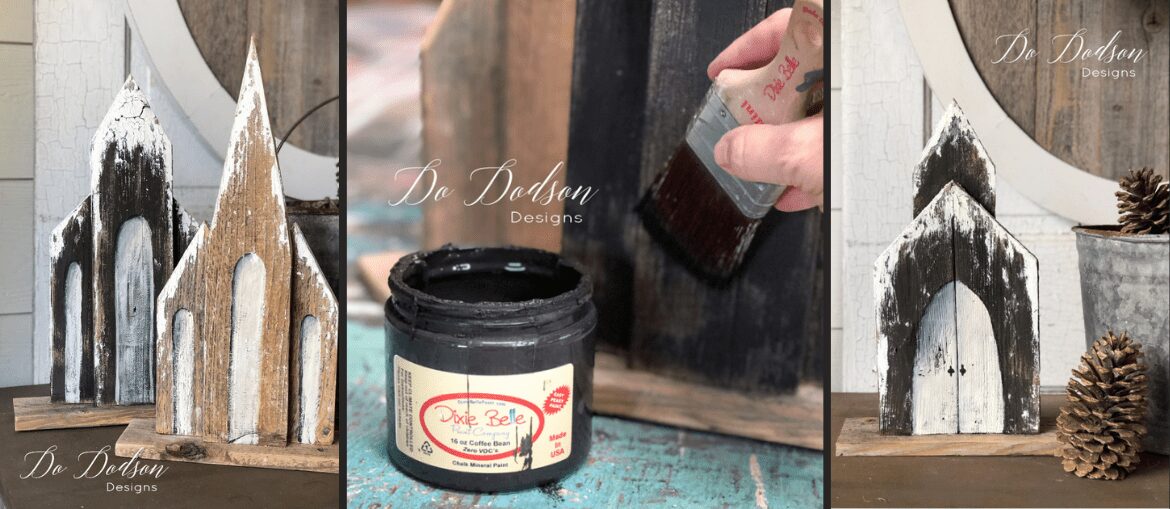
Hello sweet friend! It’s Do from Do Dodson Designs! Today I want to show you how to used reclaimed wood to create beautiful rustic wooden churches. With a few simple angled cuts and some glue, you’ll have a project that you can be proud of. And I’ll show you how to add the crowing touches with some cool texture for a dreamy snow-kissed look.

Materials List:
- Reclaimed lumber or fence pickets
- Chop Saw
- Sander or Sanding Pads
- Pin Nailer or nails
- Wood Glue
- Coffee Bean (Chalk Mineral Paint)
- Buttercream (Chalk Mineral Paint)
- Paintbrush
- Artist Brushes (for painting design on the wooden churches) and pallet knife (for texture application)
- Sea Spray Texture Additive (for Chalk Mineral Paint)
- Gator Hide (topcoat sealer)
How To:
Step 1:
These wooden churches are such fun to make and I believe that almost anyone that can cut a board can do this. Below are the cuts you will need to create these cute little shelf sitters. I used weathered fence pickets for this project but you can use what you have. That’s why I always save these scraps! The centerboard (steeple) can be adjusted to whatever angle you want.

Step 2:
Once you have your wood cut to the appropriate length and you’re happy with the angles, you’ll need to give them a good sanding before (especially if you’re using weathered lumber like these fence pickets) doing a “dry fit” of your wooden churches. A dry fit is where you put the boards together to make sure everything lines up before they are secured together.
Step 3:
Lay the boards on a flat surface and use wood glue to secure them together.
Step 4:
I decided that I only wanted to paint one of the churches. For this church, I used chalk mineral paint and dry brushed it over the wood not giving it full coverage. I wanted to leave just enough wood showing to give it that rustic look.

To read the rest of the tutorial on how to make these wooden churches, head on over to Do Dodson Designs here!


